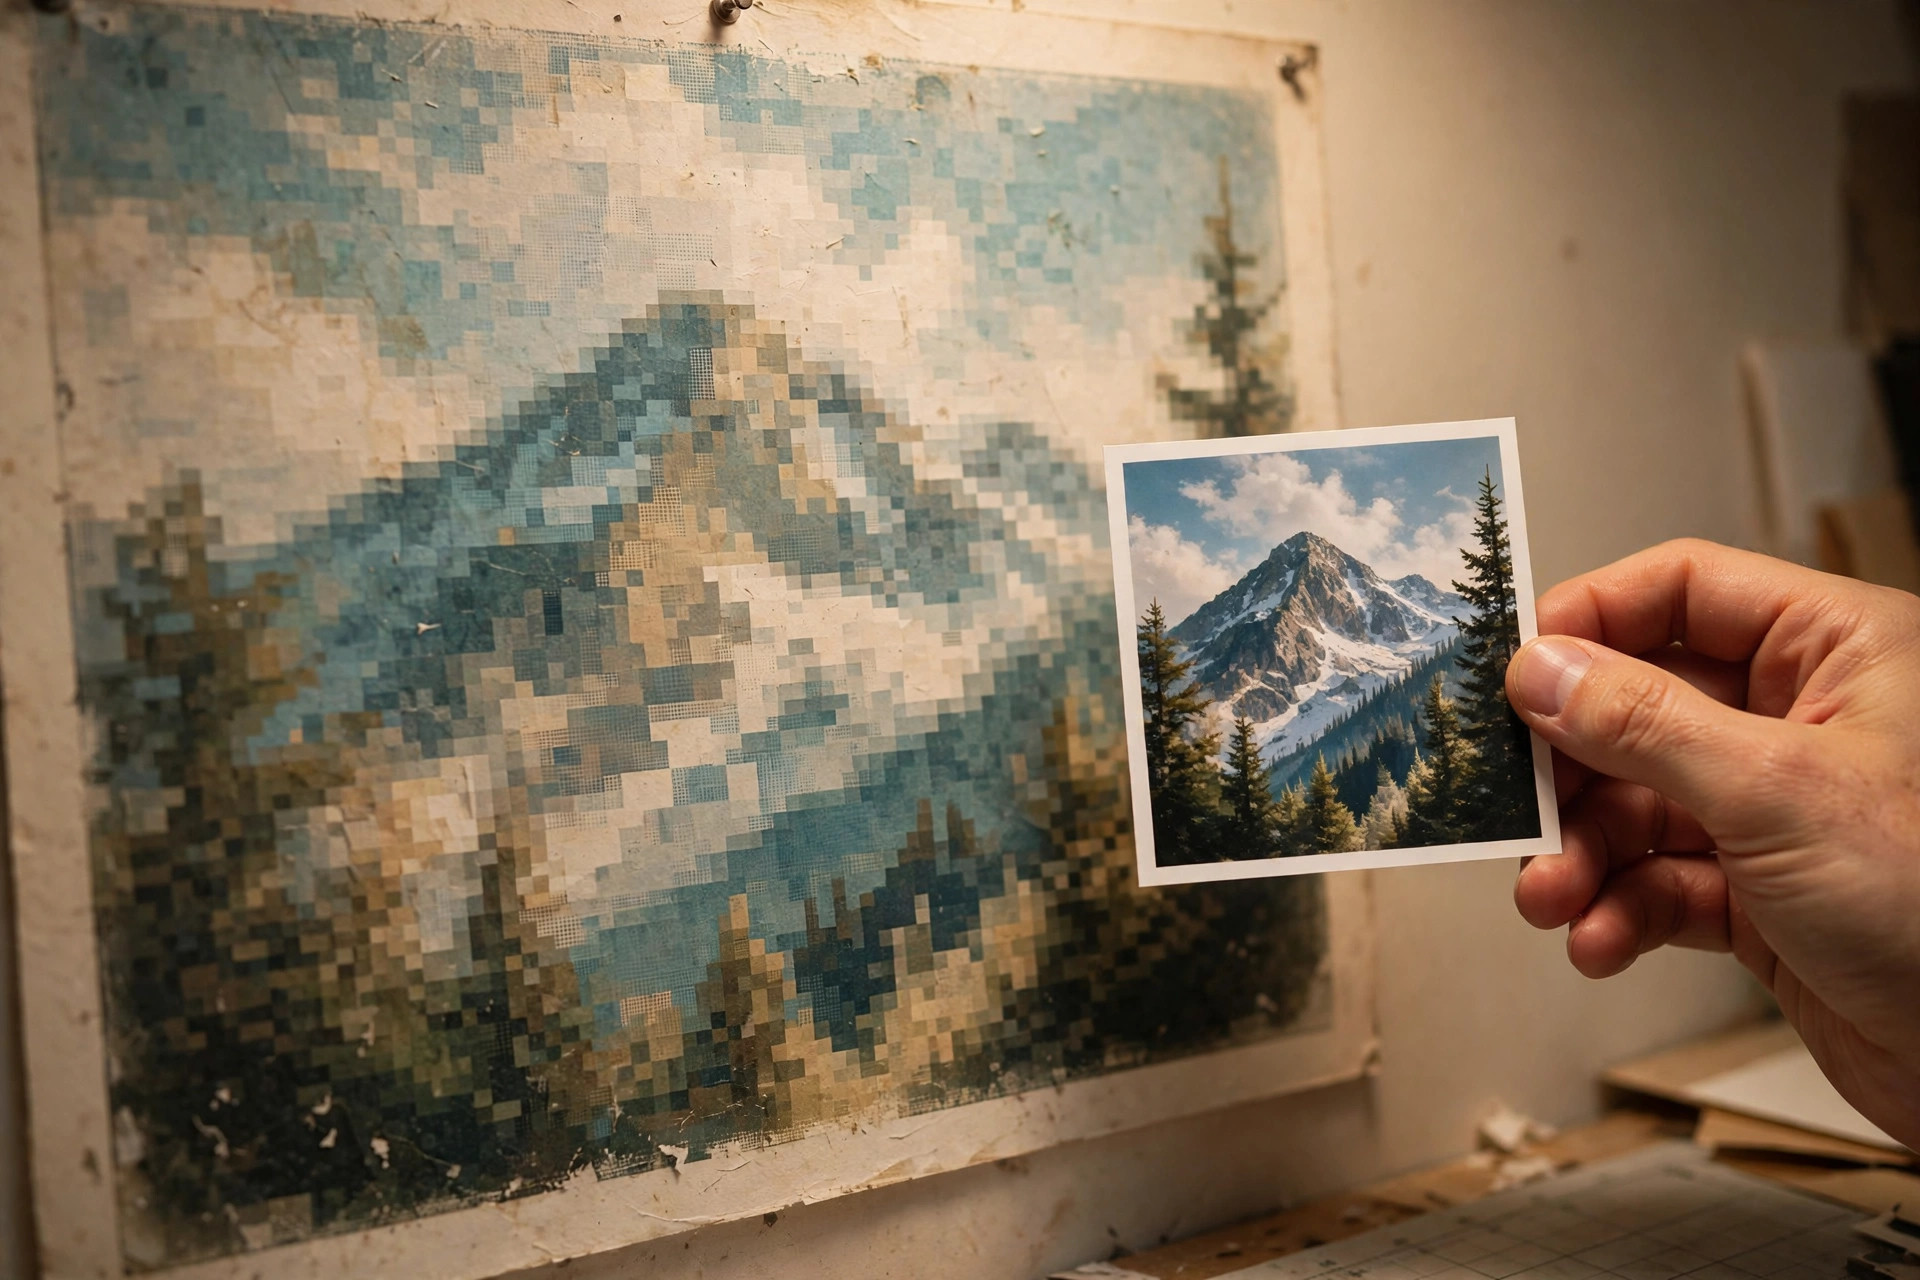
A photo can look perfect on your phone and disappointing as a poster, and nothing about the file has changed in between. The reason is simple, but it catches almost everyone out at least once: printing larger does not add detail. It spreads the detail you already have over a bigger area, until each pixel becomes large enough for the eye to notice.
This post explains that trade-off properly: what megapixels actually buy you, why upscaling cannot rescue a small file, how many pixels a poster or a banner really needs, and the quick check to run before you pay for a large print.
The one formula that explains it
Effective print DPI is calculated, not chosen by a setting:
Effective DPI = pixels ÷ print size in inches
Take a typical 12-megapixel phone photo, 4000 × 3000 pixels. Printed at different sizes, its effective DPI is:
| Print width | Print height | Effective DPI | What it means |
|---|---|---|---|
| 13.3 inches | 10 inches | 300 | Sharp close-up photo print |
| 26.7 inches | 20 inches | 150 | Good poster, viewed from a step back |
| 40 inches | 30 inches | 100 | Large poster — soft up close, fine from a few metres |
| 55.6 inches | 41.7 inches | 72 | Very large print — visibly soft up close |
The arithmetic is straightforward: 4000 ÷ 300 = 13.33 inches wide at 300 DPI, 4000 ÷ 150 = 26.67 inches at 150 DPI, 4000 ÷ 100 = 40 inches at 100 DPI, and 4000 ÷ 72 ≈ 55.56 inches at 72 DPI. Height follows the same pattern: 3000 ÷ 300 = 10 inches, 3000 ÷ 150 = 20 inches, and so on.
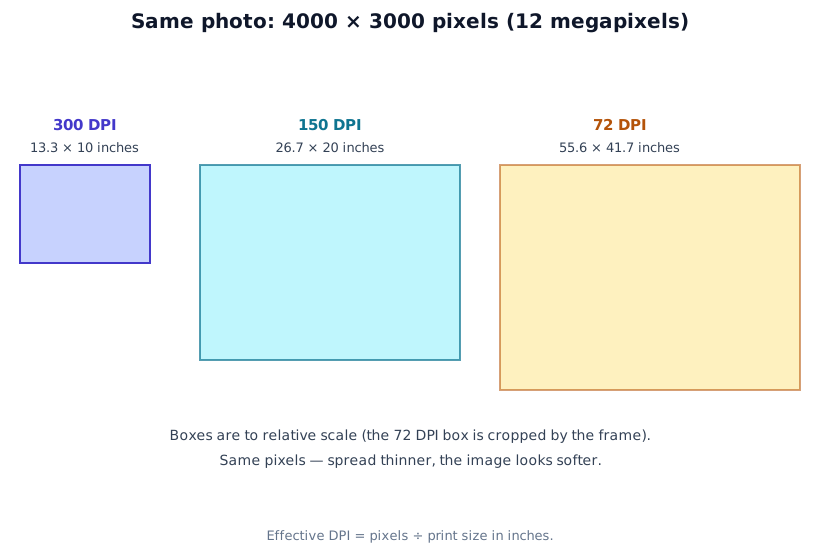
The diagram makes the point visually. The 72 DPI version is more than four times as wide as the 300 DPI version, because 300 ÷ 72 ≈ 4.17. Same file, same pixels — but every dot in the large version is more than four times wider, so edges, skin texture and small text all soften. That softness is not a printer fault. It is what happens when a fixed number of pixels is asked to cover too much paper.
Megapixels: what they actually buy you
A megapixel is one million pixels. A 4000 × 3000 image contains 12,000,000 pixels, which is 12 megapixels. More megapixels mean more raw material to spread across a print — nothing more, and nothing less. They do not guarantee a good photo: lens quality, focus, motion blur and noise matter just as much. But once a photo is sharp, megapixels decide how large it can go before it starts to fall apart.
This is why a phone screen is a misleading judge. A phone displays a photo at, say, 1170 or 1440 pixels wide, no matter how many megapixels the file contains. On that small display, a 3-megapixel photo and a 24-megapixel photo can look almost identical, because the screen throws most of the extra detail away. Print is the opposite: it shows you every pixel you have, stretched across real inches.
A useful way to think about it is paint. Megapixels are the amount of paint in the tin. DPI is how thinly you spread it. A small tin covers a small canvas thickly; spread over a wall, the same tin leaves a thin, patchy coat. No setting in the printer can make the tin bigger.
How many pixels does a poster really need?
Work backwards from the size and the DPI you actually need, using pixels = inches × DPI. Posters are viewed from further away than a photo held in the hand, so 150 DPI is a realistic target for most posters, while 300 DPI is the standard for close-up prints. The guide Pixels Needed for Printing covers this trade-off in more detail.
| Print size | At 150 DPI (poster target) | At 300 DPI (close-up target) |
|---|---|---|
| 12 × 18 inches | 1800 × 2700 pixels (4.86 MP) | 3600 × 5400 pixels (19.44 MP) |
| 18 × 24 inches | 2700 × 3600 pixels (9.72 MP) | 5400 × 7200 pixels (38.88 MP) |
| 24 × 36 inches | 3600 × 5400 pixels (19.44 MP) | 7200 × 10800 pixels (77.76 MP) |
Check the arithmetic on the middle row: 18 × 150 = 2700 and 24 × 150 = 3600, giving 2700 × 3600 = 9,720,000 pixels, or 9.72 megapixels. At 300 DPI the same poster needs double each dimension, which quadruples the pixel count to 38.88 megapixels. That jump surprises people, and it is the reason most real-world posters are not printed at 300 DPI: very few cameras capture 77.76 megapixels, and a poster does not need that density when nobody stands nose-to-paper to read it.
So a 12-megapixel phone photo (4000 × 3000) comfortably covers an 18 × 24 inch poster at 150 DPI — it has more pixels than the 2700 × 3600 required — but it falls short of a 24 × 36 inch poster at 150 DPI, which needs 3600 × 5400. It can still make a perfectly acceptable 24 × 36 inch poster at a lower effective DPI (4000 ÷ 36 ≈ 111 DPI across the long edge, depending on orientation), viewed from a couple of metres away. The question is never “is this enough, yes or no?” but “enough for this size, at this distance?”
You can run these numbers for your own photo with the Poster Resolution Calculator — enter your pixel dimensions and it shows which poster sizes work at your chosen DPI.
Banners are a different game
Banners and hoardings follow the same formula but a very different viewing distance, which changes the answer completely. A banner 3 feet by 10 feet is 36 × 120 inches. At the DPI values large-format printers commonly use:
| Banner size | At 50 DPI | At 72 DPI | At 100 DPI |
|---|---|---|---|
| 3 × 10 feet (36 × 120 in) | 1800 × 6000 pixels (10.8 MP) | 2592 × 8640 pixels (22.39 MP) | 3600 × 12000 pixels (43.2 MP) |
Again the arithmetic: 36 × 72 = 2592 and 120 × 72 = 8640, giving 2592 × 8640 = 22,394,880 pixels, or about 22.39 megapixels. At 50 DPI the same banner needs only 10.8 megapixels — well within a phone photo — because nobody reads a banner from arm’s length. From across a street, 50 DPI looks clean; up close, the same banner looks dotty, and that is expected, not a defect.
This is also why demanding 300 DPI for a banner is usually a mistake. A 3 × 10 foot banner at 300 DPI would need 10800 × 36000 pixels, or 388.8 megapixels — a file no ordinary camera produces, for detail no viewer at banner distance could ever see. The Banner Resolution Calculator lets you check realistic banner sizes without falling into that trap.
Why upscaling cannot save a small photo
When a photo is too small for the print, the tempting fix is upscaling: software that increases the pixel count, for example turning a 2000 × 1500 image (3 megapixels) into a 4000 × 3000 image (12 megapixels). The file really does get bigger — four times as many pixels, since doubling each dimension quadruples the total. But those new pixels are invented, not captured.
Upscaling works by looking at neighbouring pixels and guessing what should sit between them. Modern tools do this cleverly, smoothing jagged edges and sometimes sharpening the guess so it looks plausible. What they cannot do is recover information that was never recorded: the individual hairs, the weave of fabric, the small print on a sign in the background. If the original photo blurred two nearby details into one pixel, no algorithm can know, for certain, that there were two details there. It can make an educated guess that looks good, and for many prints that is enough to be worth doing — but it is enhancement, not recovery, and it should never be sold to yourself as “now it is a 12-megapixel photo.”
The honest test after upscaling is the same as before: look at a full-size test section from the real viewing distance. If it looks good there, print it. If it still looks soft, a bigger file has not fixed the underlying shortage of detail.
The other ways a photo loses quality before printing
Printing large exposes weaknesses that were hiding in the file all along. Five are worth checking before you blame the printer:
Heavy cropping. Cropping throws pixels away. Crop a 4000 × 3000 photo to half its width and half its height and you are left with 2000 × 1500 — 3 megapixels, a quarter of what you started with. That cropped photo now prints only 6.7 × 5 inches at 300 DPI. If you plan a large print, crop as little as possible, and check the cropped dimensions, not the original ones.
A copy of a copy. Photos passed through messaging apps or social media are often recompressed and downscaled. A photo that left the camera at 4000 pixels wide may arrive at 1080 pixels wide after sharing. Print from the original file on the camera or computer, not from the version that travelled through a chat app.
Motion blur and missed focus. Blur is invisible at phone size and obvious at poster size, because printing large magnifies the blur along with everything else. Zoom to 100% on screen and inspect eyes, text and edges before printing — what looks slightly soft at 100% will look worse on paper.
Changing the DPI label. Editing a file’s DPI metadata from 72 to 300 does not add a single pixel. It only changes the default print size the software suggests. If the image is 2000 pixels wide, it still prints 6.7 inches wide at 300 DPI, whatever the label says. The Change Image DPI tool is honest about this: it updates metadata, it does not resample the image.
Noise in low light. High-ISO photos carry grain that is easy to miss on a bright phone screen. Enlarged, that grain becomes texture across the whole print. A little noise reduction before printing helps, but heavy noise reduction also smears fine detail, so apply it lightly and judge the result at full size.
The pre-print check that prevents disappointment
Before ordering a large print, run this five-minute check:
- Find the real pixel dimensions of the file you will print — cropped, final version, not the camera original if you cropped it. The Image Resolution Checker shows dimensions and megapixels plainly.
- Divide pixels by inches for your target size. That is your effective DPI.
- Judge that number against the viewing distance: around 300 DPI for a print held in the hand, around 150 DPI for a poster viewed from a step or two back, and 50–100 DPI for a banner seen from metres away.
- Print a small section — a face, or a patch of fine detail — at full size on ordinary paper, and look at it from the distance people will actually stand at. This one test tells you more than any calculator, because it shows your photo, your printer and your eyes together.
- Only then decide: print smaller, accept a lower DPI at a greater distance, or choose a different, higher-resolution photo.
For a quick version of step 2, the Print DPI Calculator takes pixel dimensions and print size and returns the effective DPI directly, and the DPI Calculator does the same from an uploaded image.
Frequently asked questions
Why does my photo look sharp on my phone but blurry when printed large?
Your phone shows the photo small, so its pixels are packed tightly. Printed large, the same pixels are spread over many more inches, so each pixel covers a larger area and fine detail becomes visible as softness or blockiness. The file did not get worse — the print size changed the effective DPI.
How many megapixels do I need for a poster?
For a 24 × 36 inch poster at 150 DPI you need 3600 × 5400 pixels, which is 19.44 megapixels. At 300 DPI the same poster needs 7200 × 10800 pixels, or 77.76 megapixels — far more than most phones capture. That is why 150 DPI is the realistic target for posters viewed from a step back.
Will upscaling software restore a photo printed too large?
No, not in the sense of recovering real detail. Upscaling invents intermediate pixels by guessing from neighbouring pixels, so edges can look smoother, but it cannot recover eyelashes, text or textures that were never recorded. It can improve the look of a print, but it cannot turn a 3-megapixel file into a true 12-megapixel photograph.
What is the easiest check before I print large?
Divide pixels by inches. For a 4000-pixel-wide photo printed 24 inches wide, the effective DPI is 4000 ÷ 24 ≈ 167. Then judge that number against the viewing distance: 300 DPI for close-up prints, around 150 DPI for posters, and lower DPI for banners seen from metres away. Print a small section at full size and view it from the real distance before committing to the whole print.
Bottom line
- A photo loses quality when printed large because fixed pixels are spread over more inches — effective DPI falls as size rises.
- Megapixels are your raw material: 12 megapixels prints 13.3 × 10 inches at 300 DPI, but 55.6 × 41.7 inches at only 72 DPI.
- A 24 × 36 inch poster needs 19.44 megapixels at 150 DPI and 77.76 megapixels at 300 DPI — which is why posters use 150 DPI, not 300.
- Upscaling smooths a print; it does not recover detail that was never captured.
- Before you print, divide pixels by inches, judge the result against viewing distance, and test a full-size section. That check is the difference between a poster you love and one that disappoints the moment it comes off the printer.